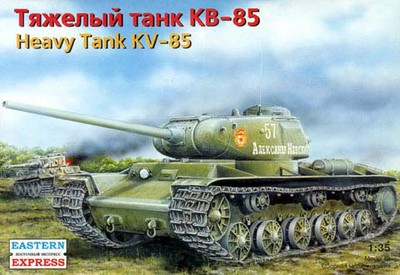
#35102 Heavy Tank KV-85
The kit depicts a very early example of the KV-85 but requires some modifications to the hull for accuracy.
The mounting plates for the towing eyes on the front and rear hull are trapezoidal, rather than round as they should be for a KV-1S hull. They can be carved away however, and replaced with styrene discs.
An exhaust air deflector plate is included, but it lacks the cut-out for the tail light and no tail light is provided in the kit.
The hull sides feature integrally molded mounts for the suspension swing arms, return rollers and drive sprockets. The swing arms themselves are separate moldings and feature the correct three retaining bolts for the torsion bar hub. The mounts include two grease fittings rather than one on each base plate, but this is a minor error. If you care, you can cut off the extra fitting in a matter of seconds.
The tracks are of the narrow split-link type with no guide 'bump' on the split links. This track pattern was the most common on the KV-1S. The kit tracks are molded in a very stiff vinyl however and it is difficult to replicate a realistic track sag. Replacing the tracks with aftermarket items will significantly improve the appearance of the finished model.
The kit provides two sets of road wheels. One full set of all-steel one-piece wheels with eight small lightening holes is included, and these wheels are evident in numerous photographs of KV-85s. The other set feature eight larger lightening holes, as seen on some KV-1S vehicles in 1943 but I have not seen photographs of KV-85s with these wheels. The drive sprockets are the late pattern with eight bolts securing the hub cover, which is correct for the KV-85. The idlers are well detailed but the hubs lack grease fittings.
The upper hull is molded as a single piece with integral fenders, and comes directly from the KV-1S kit #35100. The engine access hatch is a separate component, as are the transmission maintenance hatches, but the radiator intake screens are molded integrally with the hull top.
The bolt configuration on the engine and transmission compartment roof plates is correct for the KV-85, though most late production KV-1S hulls and KV-85 hulls lacked the central bolt on the rear edge of the transmission compartment roof plate. The lifting eyes are present but are solid and should be drilled out for an improved appearance. The kit includes lifting rings for the eyes but these are overly thick and should be replaced with thin wire or simply omitted altogether.
The fuel, oil and water filler caps are surrounded by grooves that are not present on the real vehicle. They should be filled for accuracy. The forward right-hand fuel filler cap is the early pattern with four holes, though the holes are depicted as raised bolts or rivets. The other caps are the later pattern, more appropriate for the KV-1S, which should have a single square socket in their centers. Instead, the sockets are depicted as raised circles.
The major problem with the upper hull is that the center of the turret on the KV-85 was significantly further forward than on the KV-1S, in order that the larger turret ring did not encroach into the engine compartment. The entire turret ring therefore needs to be moved some 3mm forward, as do the crescent shaped fillets that are added to the upper hull sides, just as they were on the real vehicle.
The fenders are accurate in width, though the outer vertical lips will benefit from light sanding to thin them down. The flanges that attach the fender brackets to the fenders themselves are molded integrally with the fenders, but the vertical portions of the brackets are separate components. The brackets are a mixture of the skeletal and solid patterns, but are quite thick and should be sanded down. Alternatively, you can replace them with aftermarket items or make your own from thin styrene or brass using the kit parts as a guide. The rearmost bracket on each side does not feature a truncated top edge as seen on many KV-1S hulls. The instructions tell you to cut one bracket to accommodate the hull side extensions, but the instructions direct you to cut a skeletal bracket whereas photographs indicate that the truncated bracket in this location was typically a solid bracket.
The kit provides a separate domed engine access hatch with inspection port, which is correct for the KV-1S. The lifting eyes are solid and will look better if drilled out. The kit does not provide the cable and hook for securing the hatch in the open position, but the cable can be fabricated from thin braided wire and the hook from thicker wire. The hatch is the same as that provided in the KV-1S kit, and lacks the flattened forward section on the dome.
The radiator intake screens attempt to replicate the longitudinal steel rods welded over the mesh on the KV-1S vehicle preserved at Kubinka. However, the representation is a little crude and should be replaced with after-market items. Most photographs of the KV-1S in service show the rods to be absent, so check your references for the vehicle you are modeling.
The exhausts are the early unarmored pattern fitted to all KV series
variants prior to the summer of 1943. Photographs suggest that
KV-85s used the later pattern exhausts as fitted to KV-1S and SU-152
hulls from August 1943 onward. The exhausts are separate
components but are solid. They should be hollowed out with a
drill bit and a hobby knife, or replaced with aftermarket items.
The kit includes the fixed machine gun mount in the driver's front
plate to the right of the driver's visor, but no positive location is
provided for the item and you must position it simply with reference to
scale drawings and a modicum of luck. The headlamp and siren are
included but no brackets are provided, and no positive location is
provided for either fitting. The siren is the early pattern
fitted to most KV variants prior to the summer of 1943, but photographs
suggest that many KV-85s carried a different, can-shaped siren.
The kit lacks the rain guard above the driver's visor.
The kit provides late style tow cables with cast ends. The ends are included in the kit and the instructions direct you to use thread or wire for the cables themselves, but no thread or wire is provided in the kit. The turnbuckles and rear attachment brackets are included, but the instructions incorrectly direct you to orient the brackets horizontally, rather than vertically on the upper hull applique armor plates.
Two small rectangular stowage boxes are included for the fenders, though only one is used. The instructions ignore the stowage box but it should be placed on the number 7 position. The kit also includes four cylindrical external tanks for the number 7, 8, 9 and 10 positions. No spare track links are included, so these must be sourced from aftermarket sets or other kits.
Grab rails are provided for the top edges of the hull side plates, forward of the turret, alongside the engine compartment and the transmission compartment. However, the lateral rail across the rear of the transmission compartment roof plate.
The turret shell is assembled from upper and lower halves, with the joint following the casting seam on the real turret. The bulge on the left-hand side of the turret is slightly too small and too angular, but this can be addressed with a little putty. The rear-facing machine gun mount is added as a separate component. The joint between the machine gun mount and the main turret shell will require filling and sanding to make it look like a single casting. The trunnion casting is also a separate component but this was bolted to the turret and the joint should be left and not filled.
The pistol ports and lifting hooks on the turret sides and rear are provided as separate components but there are no positive locating points and they must be positioned by eye. The instructions also direct you to attach the lifting hooks upside down; the ends of the hooks should, naturally, point downward and not upward as shown in the instructions.
The gun barrel is a single piece with a separate end cap so it does not need to be drilled out. However, I recommend replacing it with an aftermarket barrel.
